


![How to Start an Ecommerce Business in Australia [2023 Guide]](/template/e27cf56f/images/resource-blog-right-img1.png)
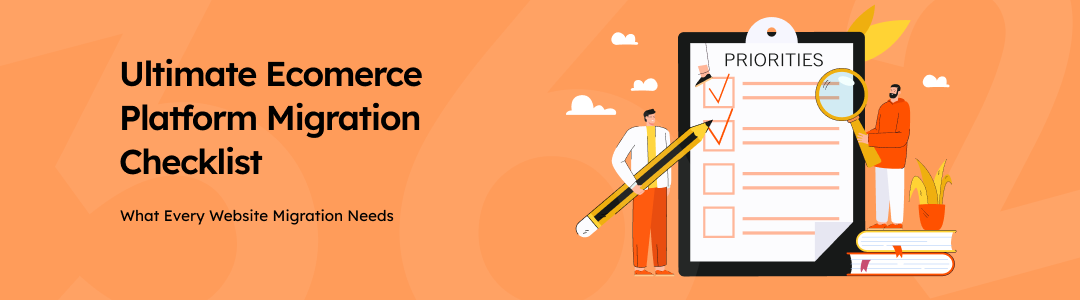
Your Ultimate Ecommerce Platform Migration Checklist
Are you looking for better performance, more flexibility, or advanced features? Thinking about moving your online store to a new platform?
That’s an exciting step!
Migration can definitely open the door to many new opportunities for your business.
But before you jump in, it is a must to plan carefully. Migrating an ecommerce store isn’t just about transferring products; you have to maintain your SEO and ensure a smooth customer experience to prevent any loss of sales along the way.
And here, with so many moving parts, it is very common for business owners to overlook critical steps that lead to downtime, broken links, or frustrated customers.
That’s why preparation is key.
The following checklist is designed to guide you through every stage of the migration process, from planning and platform selection to post-launch testing.
Follow this to make your transition efficiently, safely, and with confidence.

Section 1: Pre-migration planning
1. Define your goals
If you want a successful migration, start it by understanding why you’re moving your store. Once your goals are clear, you can make better decisions regarding platforms, features, and timelines.
Some of the common goals include the followings:
Faster store: If your current platform is slowing down due to heavy plugins, outdated themes, or server limitations, a faster store will improve customer satisfaction and conversion rates.
Better UX: If you feel that the design of your website looks outdated or hard to navigate, with migration, you can refresh your layout and improve user experience.
Improved SEO: Technical SEO issues, slow pages, or poor structure often end up affecting the rankings. A migration helps in fixing those issues while adopting a better foundation.
Lower costs: You might be paying high hosting fees, plugin costs, maintenance charges, or developer expenses for your current platform.
Scalability: As your business grows, you need a platform that can handle more traffic, products, and integrations.
By defining your goals early, you also make it easier to measure your success after the migration.
2. Choose your new platform
Selecting the right platform is one of the biggest decisions that you have to make in your migration process. You have to consider your budget, technical needs, and long-term goals.
Here are five popular options you can think of,
Shopify: Shopify is easy to use, fully hosted, and great for fast, hassle-free setup.
WooCommerce: It is flexible, WordPress-based, and ideal for stores that need deep customisation.
WebCommander: A powerful and highly scalable platform. It is designed for businesses that want full control and advanced functionality.
Magento: This feature-rich system is well-suited for large, complex ecommerce operations with custom workflows.
BigCommerce: It is known for its strong built-in features and reliable performance, especially for growing and enterprise-level stores.
Custom platform: It works best for businesses with unique or advanced requirements that standard platforms can’t support.
3. Audit your current store
When you do a proper audit, it will let you understand what you currently have, what’s outdated, and what needs improvement. You will not end up migrating unnecessary data or broken elements.
Here is an audit checklist you can follow:
Products: Fix all the missing descriptions, incorrect pricing, duplicate listings, or outdated items. Also, review everything from product variations to SKUs to inventory rules.
Categories: Clean up all messy category structures and remove categories that are unused, and rename those that seem confusing.
Customers: Do check for duplicate accounts or inactive users and decide whether you’ll migrate account passwords.
Orders: Select the order history range before migrating. Also, make sure of the consistency of order statuses.
Reviews: You must collect product reviews and ratings and make sure the new platform supports importing them.
Pages & Blog: Review and update all your About, FAQ, Contact, Content and policy pages.
Media Files: Organise product images, banners, PDFs, and video files while deleting all low-quality media.
Integrations/Apps: Make a list of the tools that are connected to your store, including email marketing, analytics, payment gateways and shipping tools.
Do check whether each tool has an equivalent version on the new platform.
4. Backup everything
Backing up your current store is a must-follow safety step. If anything goes wrong during the migration, such as corrupted files, failed imports or incorrect data mapping, you can restore everything quickly.
Here’s how you can back up:
Full site backup: Keep a backup of everything, including theme files, scripts, custom code, menu structure, widgets, and settings. It will help you to recover design elements if anything breaks during migration.
Database: You can store your core business data, including products, customers, orders, coupons, reviews and settings. If you keep a database backup, you will not lose any sales or customer information.
Images & files: You can keep a backup of product images, banners, icons, logos and downloadable items (PDFs, ebooks). Try to have them backed up separately to avoid any missing visuals on the new site.
Section 2: Data preparation and export
1. Export all your data
Before you do the migration, you must export all the essential information from your current store. You will get a complete snapshot of your products, customers, and site activity, and ensure that nothing gets lost during the transition. It will also help you to review what you’re moving so you can plan the import more efficiently.
Follow the list of data to export:
- Products and variants
- Product images
- Customers and account details
- Order history
- Coupons and discounts
- Reviews and ratings
- SEO metadata (titles, descriptions, URLs)
2. Clean and organise data
Once all your data is exported, clean it up. Following this, you can make sure that your new store doesn’t cause any errors, such as duplicate records, or messy formatting. Maintain clean and structured data for a smoother import and a better-performing store.
Here’s how you can clean and organise:
- Remove or fix duplicate SKUs
- Standardise formats considering prices, weights and variants
- Correct inventory quantities
- Update inaccurate or outdated product information
- Make sure all fields match what the new platform accepts
This preparation helps eliminate import errors and improves the overall quality and consistency of your store’s data.
3. Map your data
Every platform has its own data structure. So, you have to make sure that your exported files match with the format required by your new platform. With field mapping, you can ensure that everything ends up in the right place, including product names, descriptions, images, inventory, and customer data.
Some of the mapping tasks include:
- Review the CSV template from the new platform
- Match old field names to the new ones
- Adjust the column structure and formats
- Make sure images and product variations are properly linked
Section 3: New store setup
1. Design and theme Setup
It is another important part of your migration. This is where you can create the look, feel, and experience that customers will see the moment they land on your site.
Mobile-friendly: Most of the customers shop on their phones. So, your theme must display perfectly on mobile devices while improving browsing, making checkout easier, and boosting conversion rates.
Brand colours: Apply all your brand colours across the theme to maintain consistency and reinforce brand recognition.
Homepage layout: Highlight your most important products, collections, offers, and brand story in your homepage.
Collection layout: Collection pages should be structured so customers can browse smoothly. Maintain clean product grids, clear labels, and easy access to filters.
2. Do the core store settings
When your theme is ready, you need to configure the basic settings that control how your store operates.
Payments: Connect payment gateways like PayPal, Stripe, Afterpay, or credit card processors so allow the customers pay without issues.
Shipping: You can keep the checkout process accurate by setting up shipping zones, delivery rates, courier options, and rules for free shipping.
Taxes: Configure the tax settings based on your region. If you maintain proper tax setup, it will ensure compliance and prevent incorrect charges at checkout.
Currency: Choose the main currency your store will operate in. If you are selling internationally, set up additional currencies.
Language: Select the language of your store. You can use multilingual settings.
3. Rebuild structure
This step ensures that your new store is organised, easy to browse, and logically structured.
Categories: Recreate product categories and subcategories. Maintain a clean category structure so that customers can quickly navigate to what they need.
Menus: Build your main navigation menu, footer menu, and any secondary menus to include links between collections, pages, policies, and important content.
Filters: Set up filters such as price, size, colour, brand, and other product attributes. Filters help shoppers narrow down products easily, improving usability.
Product attributes: Re-create key attributes like sizes, colours, materials, and styles to power your filters and variations.
4. Integrations
Your store relies on various supporting tools that are used in marketing, operations, analytics, and customer communication. Reconnect all these on the new platform.
CRM: Integrate your CRM system so all customer data, purchase history, and communication workflows continue without interruption.
Email: Connect your email marketing platform to make sure that your signup forms, automation, and newsletters are running.
Shipping: Add your shipping and fulfilment apps to flow the orders correctly to your courier, warehouse, or dropshipping supplier.
Analytics: Install tools such as Google Analytics, Meta Pixel, or heatmap tools to track performance and customer behaviour.
Inventory apps: If you use any inventory management software, connect it to ensure stocks sync accurately between your store and back-end systems.
Section 4: Data import and verification
When your new store is fully ready, next step is to import all the data you need from the old platform. Following this step, you can ensure that all your products, customers, and order history are accurately transferred. Also, you get a chance to check for any errors before going live.
1. Import data
The first thing you need to do is move all the essential store information to your new platform. All the products must include titles, descriptions, variants, and images. Transfer all of your customers’ accounts, emails, and purchase history as well. Additionally, import all past orders to keep your sales records complete and accurate.
2. Verify everything
When the import is done, double-check that all data has been migrated correctly. Confirm that product counts match your old store, prices and variants are accurate. Check whether all the customers’ accounts are active. Also, make sure all past orders are intact and correctly linked to the account.
3. Fix media issues
Media files often need extra attention because mages or links can be found broken during migration. So, track any missing images, correct broken links, and fix inconsistent file names to ensure all visuals display correctly on the new store.
Section 5: SEO and URL migration
SEO is one of the most critical areas that you need to manage during a migration. Otherwise, a small error can lead to a sudden drop in rankings or organic traffic. And if handled carefully, you can ensure that your new platform maintains the same visibility, authority, and performance as the previous one.
1. Create a redirect map
A redirect map ensures that each of your old URLs is correctly linked to its new destination. Both your users and search engines can move seamlessly to the updated page without encountering errors. This will protect valuable ranking signals, while avoiding frustrating 404 pages, and helping to maintain the authority your site has built over time.
2. Transfer SEO Content
Transfer all essential SEO elements, such as titles, meta descriptions, and image alt text so your new store retains the same keyword optimisation and search relevance. This ensures that Google continues to interpret your pages correctly, helping you maintain the visibility and traffic your store previously earned.
3. Perform technical SEO setup
If you rebuild your technical SEO framework, it can ensure that search engines can crawl, index, and process your new store with no confusion. Update elements like your XML sitemap, robots.txt file, canonical tags, and schema markup. It will guide Google through your new structure and prevents indexing problems that could affect performance.
Section 6: Testing and quality checks
Before you launch, test every part of the shopping experience thoroughly to ensure everything works exactly as expected. This way, you catch errors, confirm accuracy, and fix issues that could affect customers, sales, or store performance. Also, you will get confidence that your new platform is stable, reliable, and ready for real users.
1. Product testing
Product testing ensures that all product information has been imported correctly and displays properly on your new store.
- Verify correct pricing across all products
- Confirm SKUs and inventory levels match your old store
- Check to see whether all product images are clear and in the right place
2. Checkout testing
Testing your checkout flow ensures that customers can add products, complete orders, and pay without any issues. This will help you to identify broken steps, incorrect shipping rates, or failed payments before the store goes live.
- Do the testing by adding items to the cart
- Act as a guest and complete a full checkout
- Verify the payment methods process correctly
- Check whether the shipping rates are calculated accurately
3. Performance testing
Performance testing checks how fast and smoothly your new store loads across different devices and browsers. This will allow you to provide a consistent user experience while reducing the risk of slow pages or display issues.
- Measure the loading speed of every page
- Run the usability test on mobile devices
- Check the layout and functionality on different browsers
4. Integration testing
Run this test to confirm that all connected systems are working correctly with your new platform. Verify automated emails, CRM updates, shipping tools, and inventory synchronisation.
- Ensure that CRM receives the correct customer and order data
- Test automated email flows in terms of order confirmation, abandoned cart and more.
- Confirm shipping apps calculate and update properly
- Check inventory syncing across channels
Section 7: Launch preparation
Before you go live, complete a final round of setup. When you have proper launch preparation, it will ensure a smooth, professional, and error-free opening.
1. Domain & SSL setup
Set up your domain and SSL certificate to make sure your store is secure, accessible, and properly connected to your new platform.
Update DNS: Point your domain's DNS settings to your new store. It will allow your visitors to land on the correct website as soon as you launch.
Enable SSL: Activate your SSL certificate to secure customer data and enable HTTPS to build trust by showing your site is safe and encrypted.
Test security: Check that all pages load securely and confirm the protection of sensitive actions like login and checkout.
2. Final content review
Run a full content review to ensure every page looks polished, accurate, and customer-ready before launch.
Homepage: Review the homepage and make sure everything, including banners, featured products, CTAs, and images, is consistent with your brand and functions correctly.
About page: Check that your About page clearly communicates your story, values, and brand personality.
Contact page: Verify that all contact details, forms, phone numbers, and email addresses are accurate and working properly.
Policies: Update your privacy policy, shipping policy, refund policy, and terms. They should match the new store's features and processes.
FAQs: Ensure your FAQ section answers all the common customer questions and reflects how your new platform handles orders, shipping, and returns.
3. Train your staff
Staff training ensures your team can confidently use the new platform and handle day-to-day operations without delays or mistakes.
Order handling: Show your team how to view, process, fulfil, and update customer orders so they can manage purchases efficiently from day one.
Returns/refunds: Train them on how to issue refunds. Make them ready to manage return requests and update customers. This will make the process smoother and consistent.
Inventory updates: In order to keep inventory accurate, show them how to adjust stock quantities, add new products, and manage low-stock alerts.
Section 8: Go-live and post-launch
Once your store goes live, track the first few days to ensure everything works as expected, and customers have a smooth shopping experience. With proper post-launch checks, you can stabilise your new store and set it up for long-term success.
1. Monitor first 72 Hours
The first 72 hours after launch are the most important. You can catch early errors and understand how real customers interact with your new site.
Traffic: Keep an eye on visitor numbers on the traffic flow that you are getting from search engines, ads, social media, and direct sources.
Errors: If any unexpected page errors, missing content, or loading problem happens, fix them immediately.
Checkout issues: Monitor the checkout process closely. You can identify failed payments, abandoned carts, or any wrong steps early and act.
Customer feedback: Pay attention to customer messages and comments to point out issues early that may not appear in technical reports.
2. Check redirects
Redirect checks ensure that old URLs are correctly sending users to the right pages on your new store.
Fix 404s: Quickly address any 404 pages that appear so customers never encounter dead ends.
Fix broken links: Review internal and external links and check whether they all lead to valid pages.
3. Announce launch
A well-timed announcement helps drive traffic and excitement to your new store immediately after going live.
Email: Send emails to your subscribers, be it to announce the launch, highlight new features, offers, or improvements.
Social media: Post on your social channels. This will boost buzz, build engagement, and motivate followers to visit your new site.
Ads: If you want to drive initial traffic, test conversions, and boost visibility during the launch period, run paid campaigns.
Conclusion
So, migrating your eCommerce store to a new platform doesn’t have to be overwhelming. The right plan, the right checks, and the right execution are exactly what you need.
Follow this step-by-step checklist. Run every stage from preparation and data transfer to SEO protection and post-launch monitoring with much dedication.
At the end, the new store will run smoothly and perform better.

